
Part ONE
Part TWO
Time to patch things up. Here we were after ripping out the cabinet.

It took a size-able chunk of drywall with it too.

Using drywall repair (or "mud" as they call it), I smoothed over the rough parts and built up the janky wall corner layer by layer. I also put some tape up to help visualize the shelf heights.

 |
| First layer, two more to go |
Ripping out the old toilet paper holder revealed a huge concrete mass inside the wall that was impossible to get out. I used Liquid Nails and a scrap piece of drywall to cover the hole.

Then mudded over it. This is what the first layer looks like. I'll let that dry and then put another layer on to be sanded down flush with the wall.

Once the mud dried completely and everything was patched up, I applied a layer of primer.

Then I said GOODBYE to the pink walls and painted everything a light warm gray. For some reason I went into this thinking it would be a fast job because it was such a small room. WRONG. Bathrooms are the worst rooms to paint because there are so many things to paint around. Toilets, sinks, piping, tile, doors, windows, towel bars, light switches, UGH it exhausts me just thinking about it. But I got it done and here it is.


Wheee! Now time for the shelves.
I mentioned in the previous post that I wanted to do open white floating shelves. The challenge was constructing them to have at least 1-inch thickness and require no brackets. I originally thought about using this technique by Ana White (she's a total badass furniture-making lady, btw).

As you can see, it's basically a simple wooden frame interior with a hollow wooden shell slipped over it. The only problem with this technique is that it 1) didn't take advantage of the three walls I had and 2) seemed overly complicated for my situation.
So I decided to do something that is uncommon, but not unheard of, and seemed like a simple-yet-sturdy solution. I decided to go with solid wood shelves attached to the studs with pocket holes. You'll see what I mean in a bit.

It's a Makita 7 1/4" Circular Saw and it cuts like a hot knife through butter (or as my friend Richard once said, "like butter through cheese"... oh those late-night studios). How hardcore do I look wielding this thing? Even the pink gloves look badass.

The wood I'm cutting was a lucky find. I was looking for 2x6 boards, but after a trip to one of the biggest lumberyards in Berkeley, I found out that boards of this thickness only come with rounded edges, and if I wanted sharp edges (which I did), I would have to pay a pretty penny for "finishing wood" (about $8-12 a foot and I needed 12 feet). Just as I was mentally formulating a new plan on my way home using Ana's original design, I passed a specialty hardwood store called MacBeath Hardwood and decided to stop in.
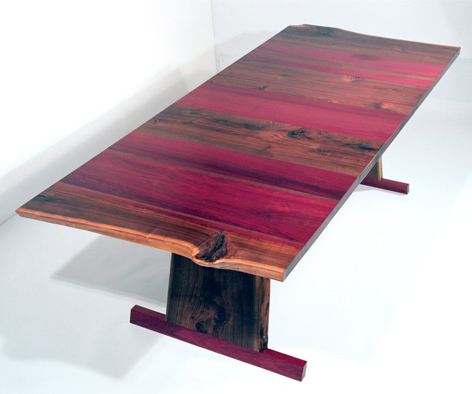
Guys, this place was every wood lovers dream! They had all these beautiful exotic woods like tiger wood, bloodwood, and purpleheart (wood that is NATURALLY purple!). I vow to build something awesome with it in the future.
 |
| Drool |
 |
| And Drool |
I obviously looked out of place in this store because the manager scoped me out almost immediately. I told him that I wanted something cheap and paint grade (i.e. not purpleheart), so he recommended poplar, which is all of the above AND lightweight. He tossed me a tape measure and took me back to the stockroom where they had 1.25" thick "random cut" lumber. Basically they take one huge board and cut it lengthwise into thinner pieces of random widths, which meant nice sharp edges! I measured and found a piece that was a good width and had them cut it to fit in my car. $38 for 16 feet (they wouldn't let me leave 4 feet of leftover).
So long story short: cheap, paint grade wood with sharp edges FOUND! And I'm obsessed with purpleheart wood.
Now back to the project at hand. I measured out the lengths I would need for each shelf, and since DIY is rarely straightforward and easy, I had to make all sorts of weird angled cuts due to the fact that the bathroom walls are not straight. So yeah, the motto "measure twice, cut once" was definitely applied in this scenario. After some hardcore circular saw action, I had these:

I filled any dents and chips with wood filler and sanded things down so they were nice and smooth and ready for paint. Here's what two coats of primer and three coats of Sherwin Williams ProClassic Enamel in Extra White looks like.

I let those dry for two full days to make sure the paint would be set and durable for the next part, which is the fun part! Enter my other new toy, Mr. Kreg Jig:

Mr. Kreg is a really amazing system for creating pocket holes, which are angled holes that you use to join two pieces of wood together using special screws. This creates a very strong joint without using glue or nails, and, in the case of a 90-degree joint, allows you to have nice clean corners without needing to countersink screws and cover with wood filler.

You can use this technique with side-by-side pieces as well, which is the method I employed with my shelf-to-stud joinery. First I located the a stud on each of the three walls and marked the corresponding location on my shelf. Then I clamped the piece securely to Mr. Kreg and used the special Kreg Jig bit to drill the holes. This whole system makes things pretty fool-proof, which is a relief.
 |
| This is someone else using a Kreg Jig because I forgot to take photos. |
Then I brought each shelf back inside and had Boyfriend hold it in place (double-triple-quadruple checking the level) while I sunk the special Kreg screws.


I expected a pretty strong connection, but not as strong as I got! After one screw, I could probably have put 50 lbs or more on the shelf, no sweat! But we wanted to make sure the shelf wouldn't see-saw on a single screw, so we went ahead and put in two more. This shelf is ready for some serious business now.

Emboldened by the success of the first, we got two, three and four up pretty quickly. I gotta say...it looks awesome. Especially compared to what was there before.


What a great idea and perfect solution for your space! Your floating shelves look so uncomplicated compared to the process I went through to make mine. Wish I had found your post sooner!
ReplyDeleteThank you! The pocket-hole hanging system is apparently not often used and therefore not often endorsed, but I had such great results with mine that I would totally do it again. The only downside I can see is trying to take the shelves out since I covered the holes up with wood filler!
DeleteThanks again for stopping by :)
Came over from a link you provided on apartmenttherapy and find myself browsing about. I love my kreg as well. Pocket holes are addictive once you get started.
ReplyDeleteI'd like to make one suggestion though. If you had put the shelf on with the holes on the bottom, they would have been well hidden. A little more difficult at first to mount though.
Also, Kreg has 'plugs' (you can see them in the product shot you have there) that will fit the holes like a glove. With a bit of caulk and paint they are practically invisible.
Thanks for stopping by! And yes, I have all sorts of kreg-jig related projects floating around in my brain right now that I need to get started on.
DeleteI considered mounting the shelves with the holes on the bottom, but I concluded that the upward angle of the screws would make a more reliable shelf hold than a downward angle. The connection is so strong though, that you could probably do it either way.
I did end up using kreg plugs to finish off the holes. You can see them in this post.
Thanks again for stopping by and for your suggestions!
Right on. If you find yourself wondering again, the direction shouldn't matter. I use them everywhere these days. Keep DIY-ing!
DeleteI want to do the same thing.
ReplyDeleteWill this work with metal studs? And if studs aren't available can you use drywall anchors with pocket holes?
I don't know what you would use for metal studs...that might be something for the interwebs. And yes, you can use drywall anchors (I did in a few of mine), but I would be more cautious about how much weight you put on the shelves. Good luck!
DeleteI love my Kreg Jig as well. I have found a neat trick from a forum (sorry, I can't remember where) for making my own pocket hole plugs. You just use a 3/8" dowel rod that costs about $0.98 at Orange. Cut it into small lengths, tap one into the pocket hole as far as it will go, then cut it level with the surface of your project. Add a tiny dab of wood filler just to be safe and then a little sanding to make it smooth. It works beautifully and is cost effective. Sure, it's a bit more work than the special made plugs for the Kreg Jig but to me, saving money is important. I can usually get 15-20 plugs from one dowel and that's being less than careful with measuring the lengths I cut.
ReplyDelete